

Not too long ago I observed an irresistible supply on Craigslist: a Majestic 3C70 AM/shortwave radio for simply US $50. This mannequin dates from the Nineteen Thirties, when such radios got here in beautiful wood cupboards. The specimen I came across was nonetheless within the possession of the unique proprietor, who used to hearken to it together with her household when she was somewhat woman. The wooden and speaker cloth had been properly preserved, in all probability wanting a lot as they when Japan attacked Pearl Harbor. I snatched it up.
I knew on the very least I’d must change a bunch of capacitors. However after scrutinizing the underside of the chassis, I noticed I’d be doing much more, as a lot of the unique wire insulation had disintegrated. Thus started a journey that finally led me to construct my very own model of a essential piece of restoration expertise: a dim-bulb tester.
My journey began with on-line looking out that turned up a circuit diagram for my radio, together with loads of recommendation from vintage-electronics restoration specialists. The chief piece of knowledge was “Watch out.” Even when new, electronics of the vacuum-tube period may very well be harmful. Being the cautious sort, I wished to take all acceptable security measures.
Particularly, when working with tube-era electronics, you need to resist the urge to only plug it in to see if it really works. Many years-old paper and electrolytic capacitors are virtually assured to be unhealthy. And far else may very well be amiss as effectively. As an alternative, make the repairs and upgrades you identify are wanted first. Even then, don’t simply plug in your relic and flip the ability change. Higher to begin it up gently to search for indicators of bother.
How Does a Dim-Bulb Tester Work?
However how do you activate outdated gear gently? That idea was international to me, having grown up within the transistor period. And that is after I realized about dim-bulb testers. They benefit from the truth that the resistance of an abnormal incandescent gentle bulb will increase markedly because the filament heats up. The tester sits between your system and the wall plug. The bulb is wired in collection to the ability line and acts as a present limiter: Even when a element or wire in your system fails and causes a brief, the present flowing into the system received’t exceed the present that might usually circulation by means of the bulb. You possibly can management the utmost present by utilizing bulbs of various wattages.
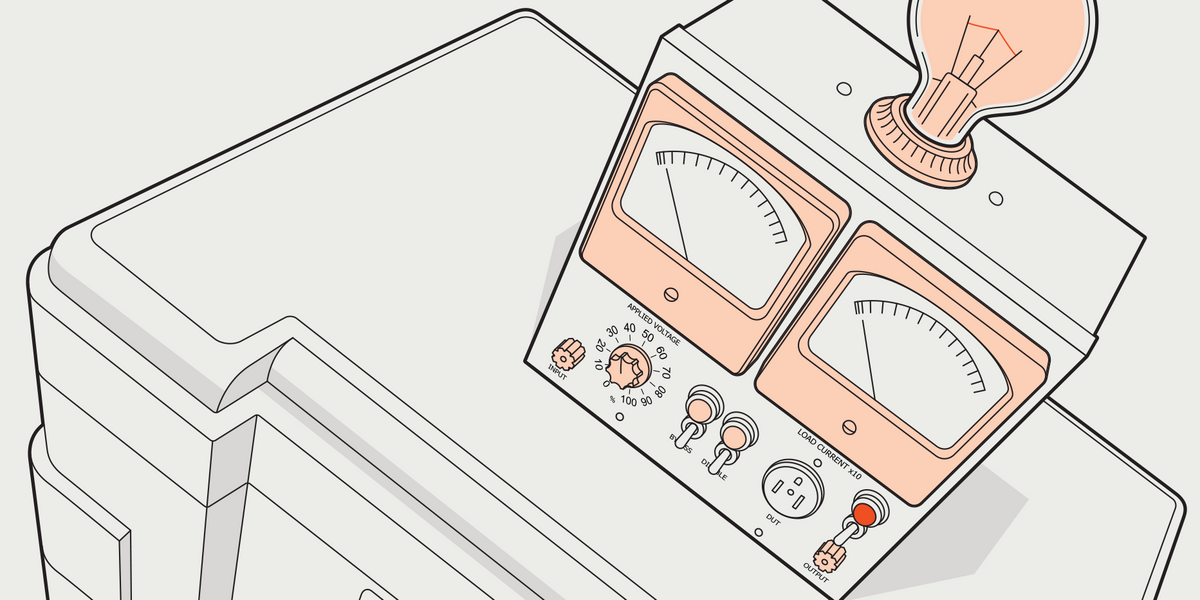
Caption: As a result of the dim-bulb tester depends on an incandescent bulb [top middle], a sure retro look is assured. I leaned into this aesthetic by utilizing classic analog meters [top left and right], and having a metallic entrance panel custom-made by an indication maker [bottom].James Provost
Positive, you’ll be able to cobble collectively such a tester utilizing simply an outlet field, a lamp base, and a change. However I made a decision to go all out on the protection entrance and construct a extra totally featured dim-bulb tester, one thing akin to a design that I noticed on-line that features a variable transformer together with panel meters to watch voltage and present. And for enjoyable, I made a decision to provide my tester a classic look.
I hunted on eBay for classic bits and items (or ones that would move as classic). Whereas the trouble to make my tester look outdated elevated the fee and slowed building, I used to be starting to love the thought of restoring outdated electronics as a brand new passion, so I figured: Why not?
The top end result was a unit that included two Triplett analog panel meters that, greatest I can work out, date from shortly after the Second World Conflict. It additionally consists of three indicator lights that have to be from the Nineteen Fifties. They adorn a entrance panel that I fabricated by ordering a {custom} aluminum signal and slicing the openings utilizing gap saws.


Choosing the right enclosure for my ersatz check instrument was one of many greater challenges. Giant enclosures are usually costly, and I additionally struggled to search out one thing that wouldn’t have appeared misplaced within the TV restore retailers of my youth. The answer was to buy a broken classic check instrument (a tube-equipped sign generator), pull the chassis out, and use its painted metal enclosure. I purchased it for lower than I might’ve paid for a brand new enclosure. I additionally purchased a small assortment of incandescent gentle bulbs of various wattages. Assembling my tester was easy.
I wasn’t fairly executed, although. In my investigations into how restore classic electronics safely, I realized about utilizing an isolation transformer to assist shield towards shocks. I toyed with the thought of constructing one into my dim-bulb tester’s enclosure, however I made a decision it was extra sensible to buy a stand-alone unit. I received a used one for a great worth, but it surely took some work to repair and modify it in order that it actually remoted the enter from the output. (Oddly sufficient, industrial items don’t sometimes supply full isolation—it’s a must to mod them for this.) I determine that I can simply plug my system into my dim-bulb tester, plug the tester into the isolation transformer, then plug the transformer into the wall.
With my accomplished tester able to go, I rigorously examined the wiring and parts of my Majestic radio and ordered what I feel I’ll want to repair it. I’ve simply acquired the field of parts from Mouser, so restore and stay testing will start shortly. I ought to add that whereas engaged on my dim-bulb tester, I couldn’t resist making one other $50 antique-radio buy: a Zenith AM/FM tabletop radio from the late Nineteen Fifties. The individual I purchased it from mentioned that it really works, however I now know there’s a proper approach and a mistaken option to confirm that assertion. So I’ve received lots to maintain me busy in my newfound passion—together with the gear I must pursue it safely.
From Your Web site Articles
Associated Articles Across the Internet


